This is a part two of my .NET Core on Linux series, if you missed part one check out the first post Hosting .NET Core On Linux.
In this article we'll be setting up a continuous delivery pipeline to ensure that your code is building and deployable all the time. I'll show you how to use Visual Studio Team Services (VSTS) to build your code and then set up a release plan to deploy your code to a Linux server via SSH.
If you've never used VSTS before it is work a look. You get free private repos and the build and release tools that will be used in this article. It offers one of the easier ways to build your ASP.NET Core 1.x or 2.0 projects, and has a host of other features as well. To learn more check it out at https://www.visualstudio.com/team-services/.
In my Hosting .NET Core On Linux article I used Ubuntu Linux so for consistency I will continue using it here as well. The Ubuntu server is hosted on Digital Ocean and you can get your own Digital Ocean account here (it even comes with a $10 credit that should be enough to run your own Ubuntu server for two months and try this out for yourself). This article will show you how to deploy with SSH so you can run your server elsewhere too.
Prepare Your Server for Deployments
Before we get to setting up the build and deployment on VSTS we'll need to do a few things on the server to get it ready to accept deplyoments.
Create a Deployment User & Group
First create a new user to use for deployments:
sudo adduser deploy
Next create a new group for the deployment capable users:
sudo addgroup deployers
Add your deploy user to the group:
sudo adduser deploy deployers
You may also want to add your personal user to the deployers group if you plan to ever manually access the directories where your content will be deployed.
Secure the Deployment User Account
Set up a new unique SSH key for the deploy user, you'll need to make sure that the new key is added to the deploy user's ~/.ssh/authorized_keys and keep the private key handy because you'll need it later while setting up the deployment.
To find out more about setting up your own SSH key check out this article written by the Digital Ocean community.
Give Your Deployment Group Access
Make sure that the locations that will receive deployments (or be manipulated by the deployment) owned by the deployment user & group:
sudo chown -R deploy:deployers /var/www/sample
In the above sample I'm changing the owner of all the files and directories my /var/www/sample directory, this is my Nginx folder where I'll deploy my files.
Allow Restarting the Service Without Sudo Access
Using sudoers or sudoers.d will allow you to specify commands that can be run by users as root without needing to be added to the sudo group. Add a new file to /etc/sudoers.d that will allow your deploy user to restart the systemd service for your ASP.NET Core site. Edit the file:
Cmnd_Alias RESTART_SVC = /bin/systemctl restart kestrel-sample.service
%deploy ALL=(ALL) NOPASSWD: RESTART_SVC
Save the edits and lock it down with chmod (640 or 440), your deploy user should now be able to restart the service.
Configure Visual Studio Team Services to Build & Deploy to Linux
In the past I've used two different methods to handle building and deploying code. One is a simple build script that also has an SSH copy task embedded in it. This method is quick and easy assuming you don't need to worry about promoting builds across environments or will never need to redeploy past builds. Using this method, if you need to redeploy a previous build you'd have to manually recreate the build and let the process deploy it, this is less than perfect.
Doing a little extra work to have more control over build artifacts, deployments, and promotions is worth it so I'll be showing you how to set up a two step build & release.
Building ASP.NET Core With VSTS
To get started set up a new project where you will store your source code, build, and release plans. Create a new project by clicking on the "New Project" menu item. We'll use Git for version control and you can select whatever you like for work items (they wont matter for this).

Next you'll need to get some code pushed to your repo. If you don't already have some code you'd like deployed to Linux, you can start off with a new sample ASP.NET Core project which can be created with the dotnet CLI dotnet new mvc -n DeploySample. After you've pushed some code to your repository click the "Build and Release" menu item from the top nav bar then select "Builds" from the secondary nav bar.
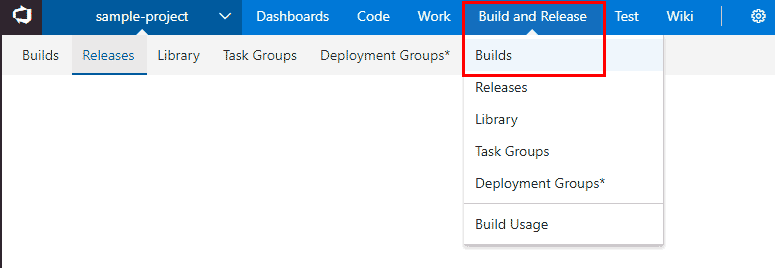
Click "New Definition" to start setting up a new build and choose the "ASP.NET Core" Template and click the "Apply" button.
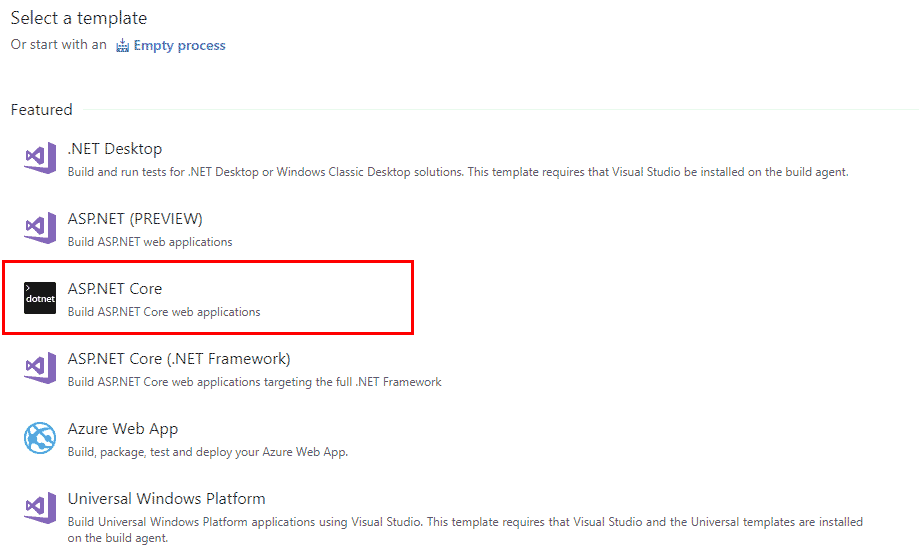
Initial VSTS Build Configuration
Before we configure the main part of the build we need to set a build agent and a name for the build. On the process task set a name for the build and set the "Agent Queue" to Hosted VS2017.
Setting up the Get Sources Task
Get sources is how your build plan acquires your code for the build process. Click the "Get Sources" item on the left side and select "This Project" as your from and make sure the Repository and branch are set for the code you want to build. For the clean options I like to specify "Clean" as true and set "Clean Options" to all build directories.
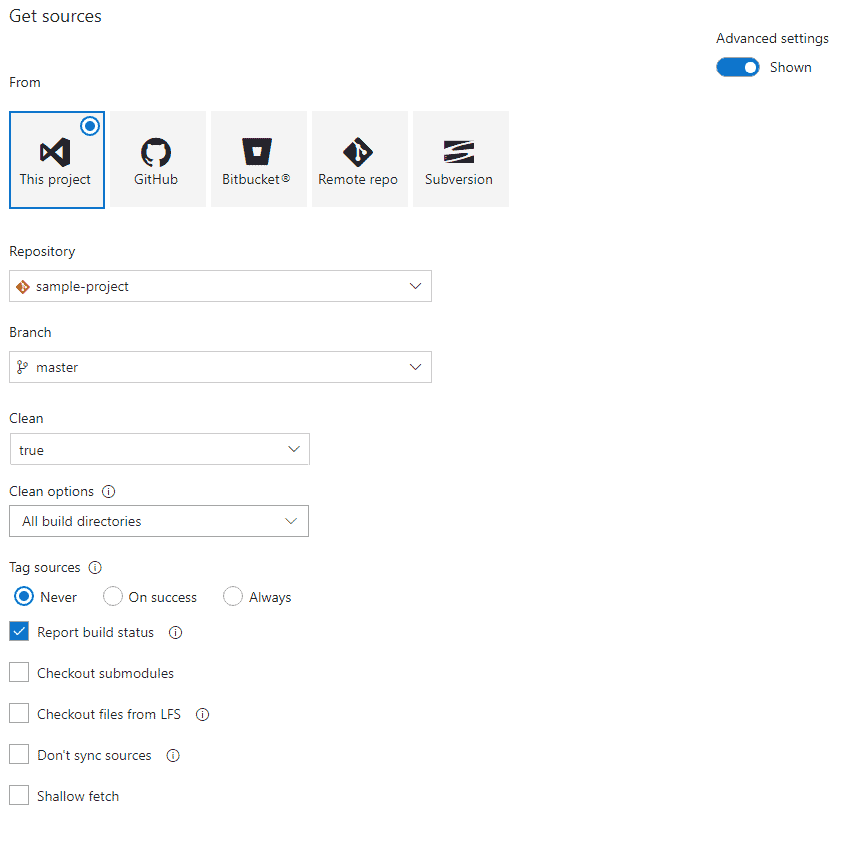
If you're using submodules in your git repository they won't automatically get pulled down for the build on VSTS, but there is a flag so that they can be included. Go to Get Sources > VSTS Project > Advanced settings and you can enable the "Checkout Submodules" setting.
Configure the actual ASP.NET Core Build on VSTS
Next Click on "Phase 1" found on the left side. Enter a "Display Name" value that makes sense to you for your build task. Now you'll need to configure the remaining steps. For the restore, build, test, and publish steps the only change that needs to be made from the default configuration is to set the Version to "2.* (preview)", leave the rest of the values to their default values.
You might have noticed I didn't mention configuring the Publish Artifact step, that's because you can leave its version set to "1.*".
After you've configured each step click on the "Save & queue" link near the top right side, just to the right of your build project's name. You'll get a popup to save the build definition and queue a build, click the "Save & queue" button at the bottom and you'll see an alert towards the top of the screen like this:

You can click the link to watch the build do its thing, or just give it a couple minutes to complete.
Click on the Builds link on the top left to go back to your list of build definitions and you should see the status of your build is "succeeded". If it's still in progress keep waiting and check in another minute or two.
VSTS Release Configuration
Now that your code is building click the Releases menu item and then click the "New definition" button to start configuring a new release plan. You'll be greeted by a screen with a lot stuff on it, but don't worry because all we need for this definition is to start with the "Empty process" link from the top, so click it and then give your environment a name and close the modal.
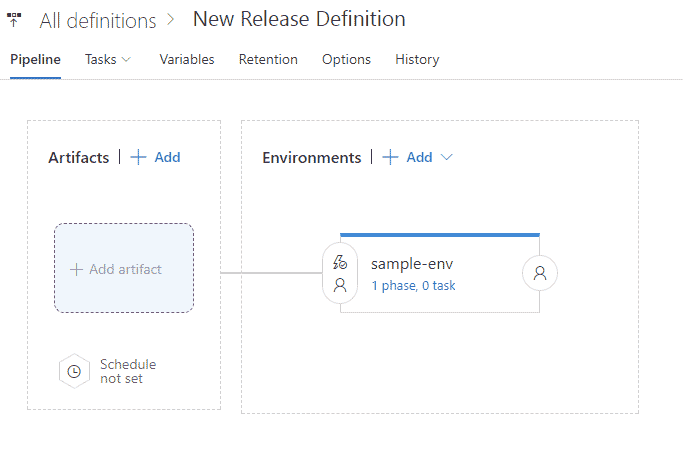
Configuring Your VSTS Deployment Environments
You can add one or more environments for your release to work with, for now we'll just stick to one environment. Click the "1 phase, 0 task" link in your new environment.
Adding an SSH Copy Task
Click the + next to "Agent phase"
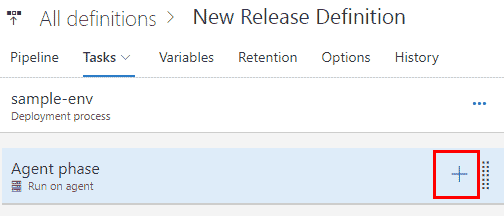
On the Add tasks screen use the search box to find the "Copy Files Over SSH" task and add it. Set the display name to whatever you find useful, skip the SSH endpoint for now.
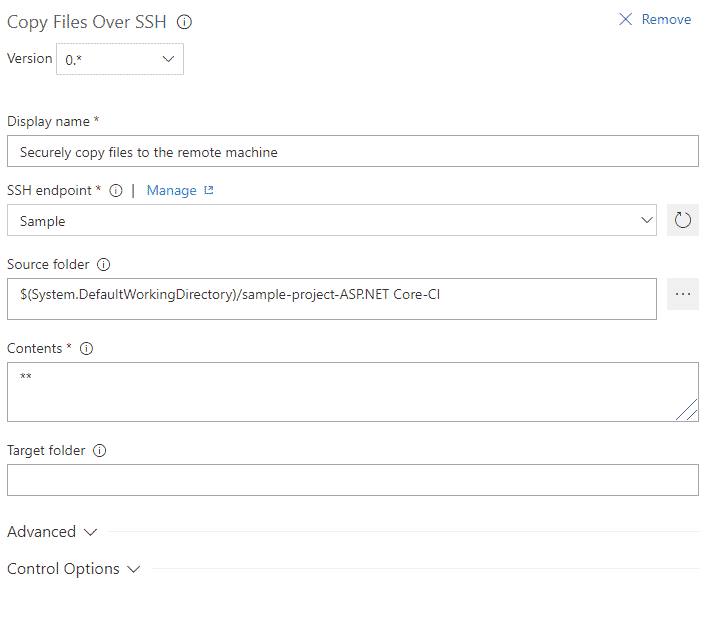
Set the Source Folder by clicking the ellipsis (...) button to the right and select the linked artifact, it should end up with a source folder value along the lines of $(System.DefaultWorkingDirectory)/sample-project-ASP.NET Core-CI.
Leave the contents to ** and set your target folder to the location on your server you want to deploy the code, for this example I'm putting the code in /var/www/sample.
Adding a New SSH Endpoint
You'll recall we skipped over the SSH enpoint earlier, now it is time to set it up too. Click the "Manage" link to the right of SSH endpoint, then in the next screen click "New Service Endpoint" and select "SSH". This will prompt you for some information:
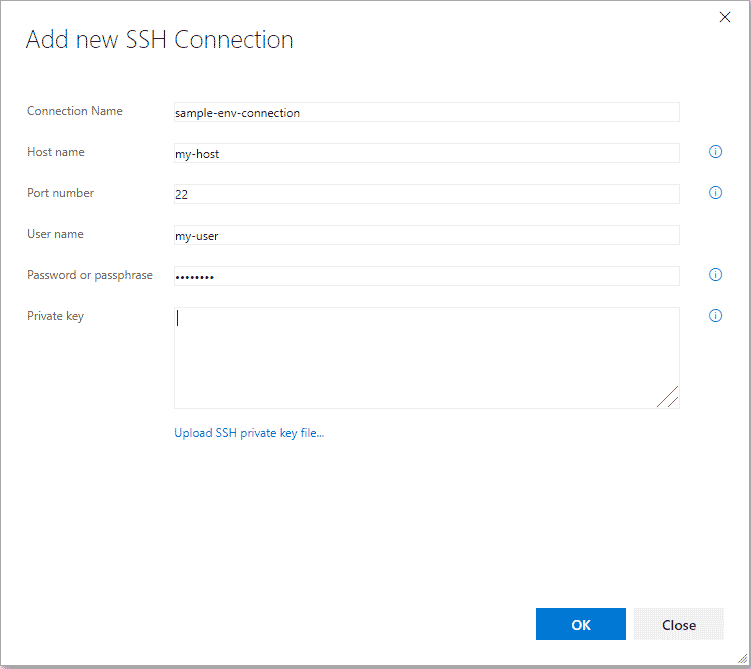
For the Private Key field you'll want to use the private key we created earlier so that VSTS can access your server to deploy the build.
After you've saved your new service endpoint, go back to the release definition and click the refresh button to the right of the SSH endpoint box, then you'll be able to select the end point you just created. Your copy task should end up looking something like this:
Adding an SSH Command Task to Delete Old Release Files
Now that the Release Agent can communicate with the Linux Server we'll be creating a few SSH tasks to make the deployment happen.
Add a new task to the Agent Phase and in the search box enter "SSH", then add the SSH Task to the Agent Phase. Set the SSH endpoint to the one you just created.
This first task will be in charge of deleting the old release on the server, so name it appropriately and then enter the commands needed to delete the old release files. Typically I use rm -f and specify the file(s) and/or directories to remove.
Adding an SSH Command Task to Unzip the VSTS Build Drop File
Create another SSH task, give it a good name and set the SSH endpoint. The VSTS build process creates a zip file artifact, in this task we'll unzip it to the location where we want to host the ASP.NET Core site. After unzipping the drop file we can remove it from the system.
Adding an SSH Command Task to Restart the Service
Create a third SSH task that will restart the systemd task for the ASP.NET Core web service. If you followed along with my Hosting .NET Core On Linux post you should have a service with a name along the lines of kestrel-sample.service this will be the service we need to restart.
Give your SSH task name and set the SSH endpoint and set the command to restart the aforementioned service:
sudo systemctl restart kestrel-sample.service
Did you notice that this command is using sudo? Do you recall when we set up the deploy user it wasn't added to the sudo group? This is why we set up sudoers.d in the preperation steps earlier in this post. That extra configuration means the deploy user should now be able to restart the service without being in the sudo group, which makes our server a little bit more secure.
Selecting Which Code to Deploy in VSTS Release Plans
When the build ran earlier it generated an artifact, which is the build results. To tell our release plan which build & artifact to deploy we will add an artifact by clicking on the Add Artifact box on the left side.
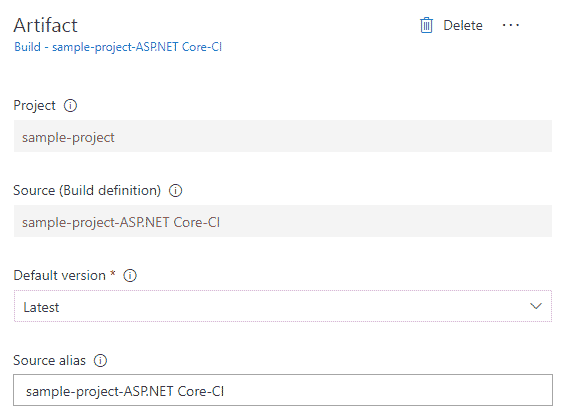
The source type should be set to build, and the you'll need to set the Source Build Definition. The dropdown should be populated with the name of the build that was just created. Select that build and the deployment will use the artifact published in the final step of the build.
Setting up Continuous Deployment for your VSTS Release Plan
Setting up the continuous deployment trigger isn't the clearest part of creating a new build definition. On the artifact that was added there is a circle with a lightning bolt in it, click it.
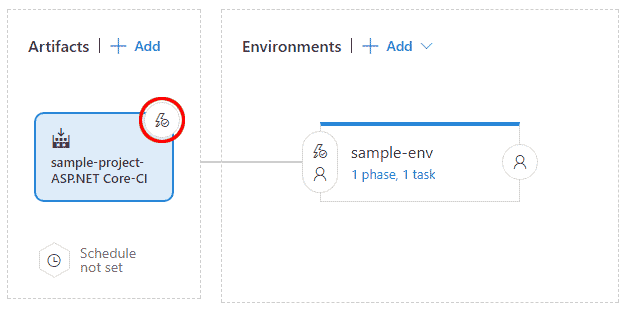
In the box that pops up enable the trigger, then specify the branch you'd like to use to trigger this release. This tells VSTS to start a new release when a build completes successfully on the given build plan.
Wrapping Up
By now you should have a fully functional build & deployment pipeline for your ASP.NET Core application. Deploying the latest version of your code to your Ubuntu server should now be as simple as a git push and a couple minute wait.
If you missed my post on Hosting .NET Core On Linux be sure to go read it so you can get your ASP.NET Core application running properly on Ubuntu.
